react-sketchapp 사용법
이전 포스팅에서 react-sketchapp에 대한 간략한 소개를 드렸습니다. 이번에는 실제로 프로젝트를 만들고, 디자이너와 협업하기 위한 시작점으로 프로젝트를 생성하여 react-sketchapp을 설치하고, 간단한 test component를 만들어 plugin 형태로 sketch에 배포하는 것을 진행하겠습니다.
1. 프로젝트 생성 및 설치
1) skpm 설치
원래는 react-sketchapp에 있는 소스를 fork하여 만들 수도 있겠지만, 실제로 react-sketchapp 관련하여 reference도 많이 없을 뿐더러, 설명도 참.. 심플(?) 하게 해놓은 관계로.. 이부분에서 처음부터 엄청 애를 먹었던 기억이 납니다.. 실제로는 skpm 모듈을 전역으로 설치하여 skpm을 이용해 프로젝트를 만드는것이 가장 빠르고 안정적이었다고 주관적으로 생각합니다.
bash창을 열고 다음과 같이 입력합니다.
npm install -g skpm2) skpm을 이용하여 프로젝트 생성
앞서 설치한 skpm global 모듈을 이용하여 test-plugin이라는 프로젝트를 생성해줍니다.
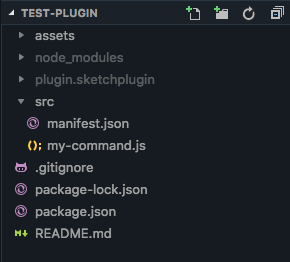
skpm create test-plugin생성하시고 나면, 다음과 같은 폴더 구조를 확인하실 수 있습니다.
3) react, react-sketchapp 설치
skpm 모듈은 sketch-app을 플러그인 형태로 만들어주는 모듈일 뿐이기 때문에, 실제로 프로젝트 내에서는 react 관련 모듈들을 설치해 주어야 합니다.
# react 관련 모듈 설치
npm i react react-sketchapp react-test-renderer --save
4) es6 사용시, babel 같이 설치
요새는 react 개발시에 대부분 es6를 사용하시기 때문에, babel 모듈을 이용하여 bundling 할수 있도록 변경해줍니다. (이후 webpack.skpm.config.js 파일을 통해서 webpack을 이용할 수 있습니다.)
npm i @babel/preset-env @babel/preset-react --save-dev2. 프로젝트 생성 및 환경 설정
1) .babelrc 설정
react 환경에 대한 babel 환경을 설정해주기 위해서, babelrc를 생성합니다. 생성한 babelrc에는 env 및 react preset을 설치해 줍니다.
// .babelrc
{
  "presets": [
    "@babel/env",
    "@babel/react"
  ]
}
2) Test component 작성 (es6 기준)
본 포스팅에서는 간단하게 Test.js라는 컴포넌트를 만들겠습니다.
// src/sketch/Test.js
/**
 * sketch example
 */
'use strict';

import React from 'react';
import { render, Document, Page, Artboard, View, Text } from 'react-sketchapp';

const styles = {
  page: {
    width: 2000,
    height: 1000,
    display: 'flex',
    flexDirection: 'row',
  },
  container: {
    width: 360,
    height: 640,
    marginRight: 20
  },
  wrapper: {
    width: '100%',
    height: '100%',
    backgroundColor: '#bdbdbd',
    display: 'flex',
    alignItems: 'center',
    justifyContent: 'center',
  },
  text: {
    fontSize: 20,
    fontWeight: 'bold',
    color: '#000000'
  }
};

const TestSketch = () => (
  <Page style={styles.page}>
    <Artboard name='테스트1' style={styles.container}>
      <View style={styles.wrapper}>
        <Text style={styles.text}>Test1</Text>
      </View>
    </Artboard>
    <Artboard name='테스트2' style={styles.container}>
      <View style={styles.wrapper}>
        <Text style={styles.text}>Test2</Text>
      </View>
    </Artboard>
  </Page>
);

export default (context) => {
  render(<TestSketch />, context.document.currentPage());
};
Test component는 현재 간단하게 만들어져 있습니다. 기본적으로 react-sketchapp은 react-native 처럼 View, Text, Image 등의 Component를 사용합니다. 구조도 비슷하며, 만드는 방법이 react-native와 유사하여 오히려 더 괜찮았습니다. 어차피 sketchapp에서는 Touchable component나 scrollview가 쓰일 일이 많지 않으므로, 이러한 부분들은 View 혹은 Text로 제어할 수 있도록 만듭니다.
나중에 만드시다보면 아시겠지만, 해당 구조를 그대로 react-native 환경에 쓰기 위해서 미리 구조를 잡아놓고 개발하는 것도 가능해집니다. 이렇게 개발하다 보면, 어느정도 컴포넌트 구조를 미리 설계하고 가는듯한 느낌이 들더라구요(ㅎㅎ)
실제로 TestSketch라는 변수에는 react-sketchapp에서 쓰이는 root인 Page를 시작으로, 각각의 화면을 표시하기 위한 Artboard 내에 View 객체를 사용하고 있습니다.
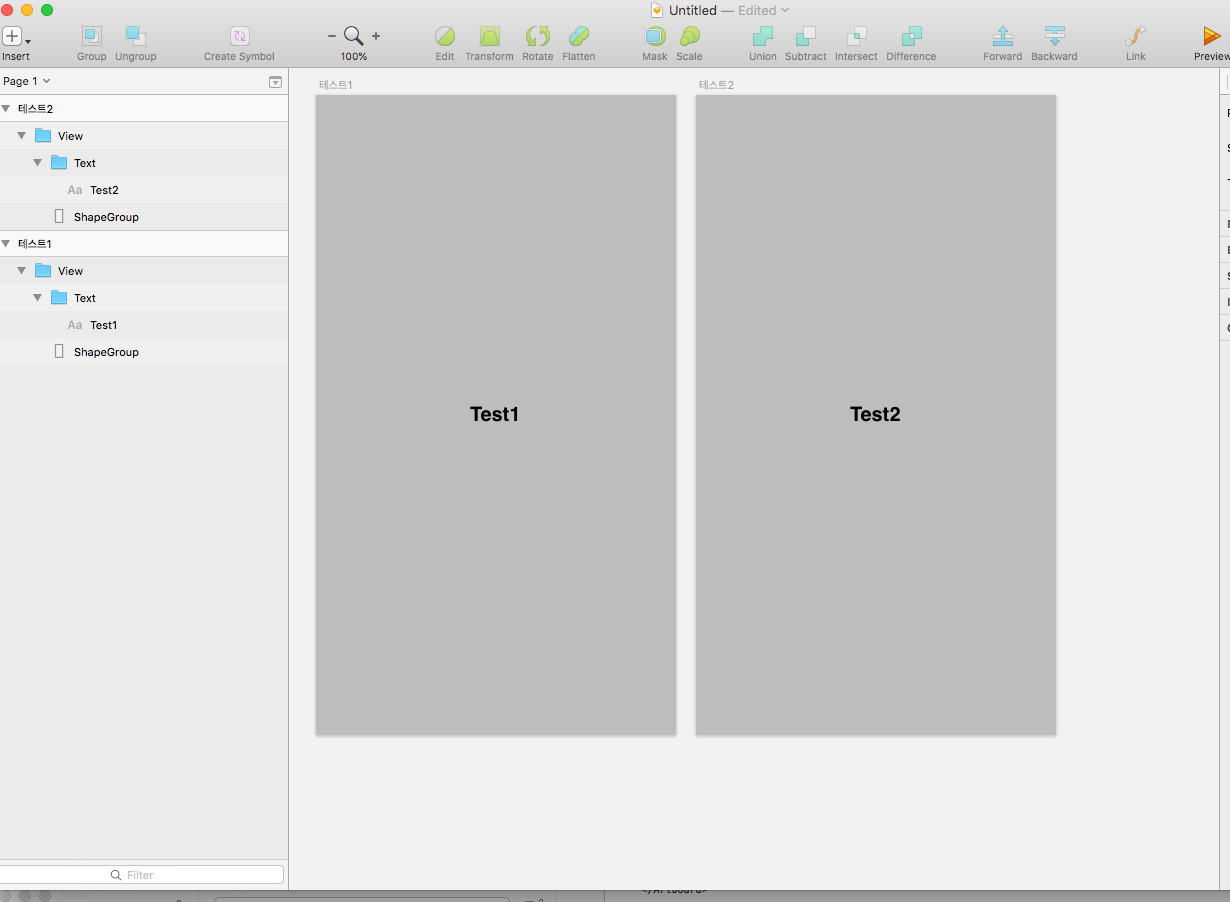
실제로 해당 example component가 sketchapp에 plugin 형태로 삽입되는 모습입니다. 왼쪽 폴더링 구조를 보시면, Page1이 현재 react-sketchapp의 Page component가 되며, 하위 depth2의 경우 테스트2, 테스트1은 Artboard Component를 나타내고 있습니다. 각 component는 name이라는 props를 이용하여 네이밍 해줄 수 있습니다.
하단에는 react-sketchapp에 내장된 render 함수를 이용하여 렌더링합니다. context.document.currentPage() 는 현재 document에 렌더링 하도록 명령합니다.
3) manifest.json 수정
Test.js를 통해 component를 만들었으면, manifest.json을 수정해줄 차례입니다. 실제로 react-sketchapp 혹은 skpm에서는 manifest.json을 이용하여 빌드 또는 플러그인을 생성하게 됩니다. manifest에 대한 정보는 package.json에서 skpm 항목에 설정된 manifest를 빌드하도록 되어 있습니다.
// package.json
{
	"name": "react-sketchapp-examples",
  "manifest": "src/manifest.json",
  "main": "plugin.sketchplugin",
  "assets": [
    "assets/**/*"
  ]
}
package.json을 보면, manifest 항목에서 src/manifest.json을 target manifest로 기준삼아 빌드하도록 되어 있습니다.
// src/manifest.json
{
  "compatibleVersion": 3,
  "bundleVersion": 1,
  "commands": [
    {
      "name": "스케치 테스트",
      "identifier": "test-sketch",
      "script": "./sketch/Test.js"
    }
  ],
  "menu": {
    "title": "스케치 테스트",
    "items": [
      "test-sketch"
    ]
  }
}
manifest.json을 보시면, commands 항목에는 다음과 같이 구성되어 있습니다.
- name: plugin에 표시될 이름을 설정합니다.
- identifier: 이후 메뉴에서 보여주도록 설정할 식별자를 표시합니다.
- script: 해당 identifier에서 바인딩할 script를 표시합니다.
menu에서는 실제로 sketch app의 plugin에 표시될 이름을 title 형태로 넣어주며, items에는 보여주고자 하는 command 항목 내의 identifier를 배열 형태로 삽입해줍니다. 즉 현재 menu의 items 항목 배열에 test-sketch라고 정의된 commands를 plugin 형태로 실행하게 됩니다.
3. react-sketchapp 실행
# build
npm run build
# start with watch files
npm run start
npm run build를 하게 되면, 해당 파일을 plugin 형태로 빌드하게 됩니다. 만약 watch 설정과 함께 개발하시고자 하신다면, npm run start를 입력하면, 파일을 자동으로 감지하며 빌드하게 됩니다.
이제! 만든 파일을 sketch-app으로 열어볼 차례입니다. sketch app을 열어주세요!
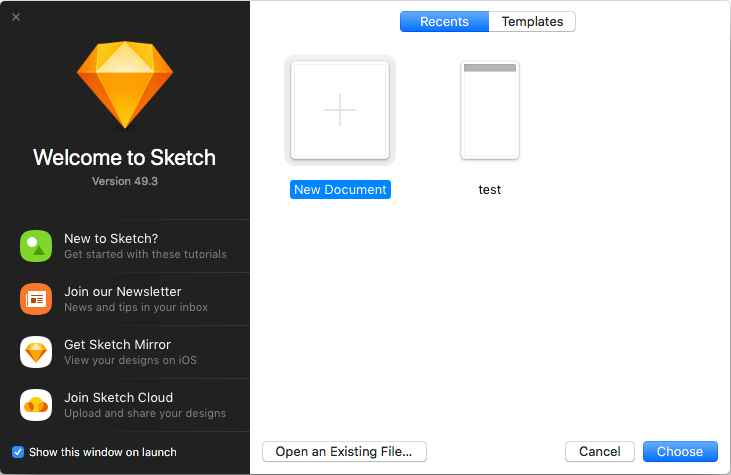
plugin을 통한 확인이기 때문에, New Document를 선택합니다.
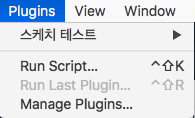
Mac os 상단에 Plugins 메뉴를 보시면, 이전에 설정했던 스케치 테스트라는 항목이 보입니다. 해당 항목을 선택해 주시거나, Manage Plugins에서
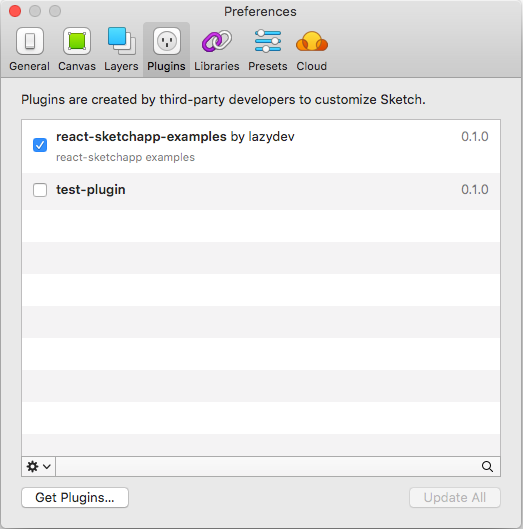
정상적으로 빌드가 되었다면 스크린샷처럼 plugins 탭을 클릭하시면, 해당 plugin을 로드할 수 있습니다.
마무리
지금까지 react-sketchapp을 간단하게 맛보기 형태로 구현하였고, 구현한 react-sketchapp의 plugin을 sketch app에서 실행해 보았습니다. 다음 포스팅은.. react-sketchapp을 실행하면서 겪었던 몇가지 이슈들을 중점으로 설명드리고, Component들에 대한 설명을 곁들일 것 같네요~ 해당 소스는 제 github repository 에서 확인하실 수 있습니다.